前情提示 阿里、tx、西数centOS6.4,6系列均可cat /etc/redhat-release
gogs0.11.91(0.13会有重大变化,持续更新)
Git 最新稳定版本;
Mysql8 最新稳定版本;
更新说明
去除普通图片截图,保留部分核心截图;详细截图可参考:https://blog.csdn.net/qq_31708763/article/details/104814669
软件准备 软件下载,官网下载或云盘下载。步骤略。
将下载好的软件上传到服务器。
1
2
3
mkdir -p /server/backup/gs scp -P 22000 -r -v /server/backup/gs/* root@211.149.239.182:/server/backup/gs scp -P 22 -r -v /server/backup/gs/* root@59.110.21.159:/server/backup/gs
MySQL安装 1 2 3 4 5 6 7 8 9 10 rpm -qa|grep mysql # 如果有,卸载 yum remove mysql mysql-server mysql-libs compat-mysql51 rm -rf /var/lib/mysql ##可能cannot remove ‘/etc/my.cnf’: No such file or directory rm /etc/my.cnf rpm -e mysql-community-client-8.0.20-1.el6.x86_64 --nodeps rpm -e mysql-community-libs-8.0.20-1.el6.x86_64 --nodeps rpm -e mysql-community-server-8.0.20-1.el6.x86_64 --nodeps rpm -e mysql-community-common-8.0.20-1.el6.x86_64 --nodeps
安装依赖
1 yum -y install wget gcc-c++ ncurses ncurses-devel cmake make perl bison openssl openssl-devel gcc* libxml2 libxml2-devel curl-devel libjpeg* libpng* freetype* make gcc-c++ cmake bison-devel ncurses-devel bison perl perl-devel perl perl-devel net-tools* numactl*
安装MySQL
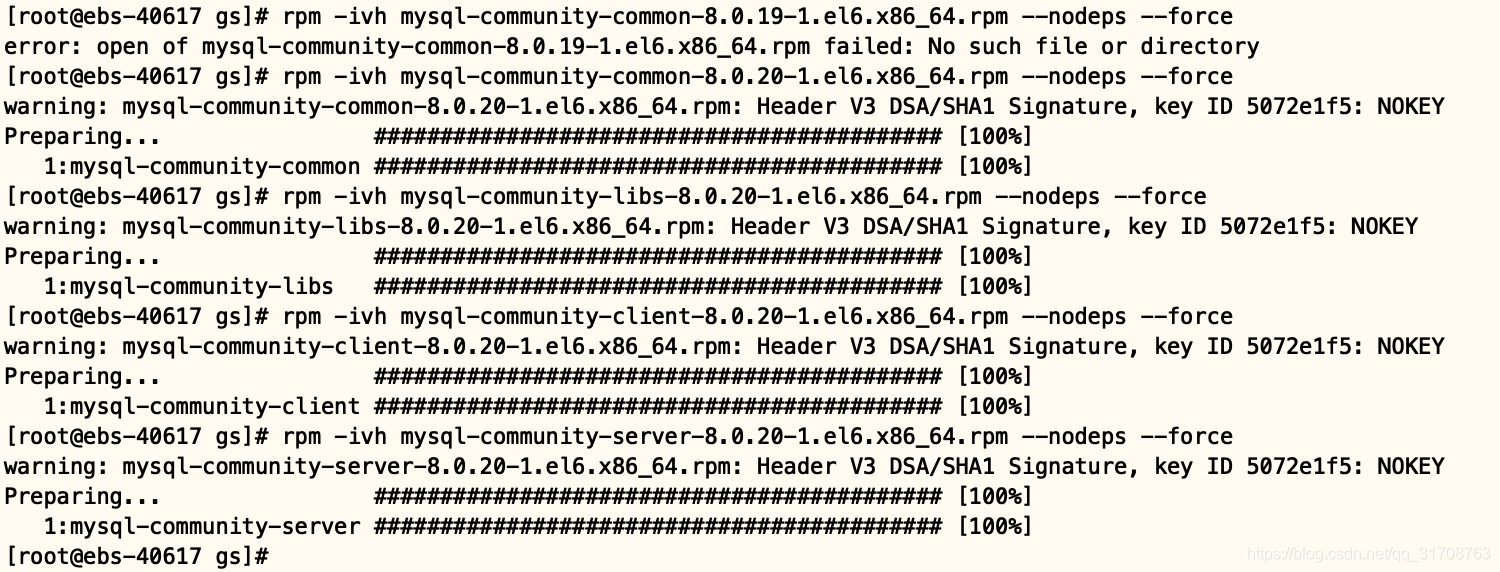
1 2 3 4 5 cd /server/backup/gs/ rpm -ivh mysql-community-common-8.0.20-1.el6.x86_64.rpm --nodeps --force rpm -ivh mysql-community-libs-8.0.20-1.el6.x86_64.rpm --nodeps --force rpm -ivh mysql-community-client-8.0.20-1.el6.x86_64.rpm --nodeps --force rpm -ivh mysql-community-server-8.0.20-1.el6.x86_64.rpm --nodeps --force
配置/etc/my.cnf,添加如下:
1 2 lower_case_table_names=1 sql_mode='STRICT_TRANS_TABLES,NO_ZERO_IN_DATE,NO_ZERO_DATE,ERROR_FOR_DIVISION_BY_ZERO,NO_ENGINE_SUBSTITUTION'
完整内容:
1 2 3 4 5 6 7 8 9 10 11 12 13 14 15 16 17 18 19 20 21 22 23 24 25 26 27 28 29 30 31 32 33 34 35 # For advice on how to change settings please see # http://dev.mysql.com/doc/refman/8.0/en/server-configuration-defaults.html [mysqld] # # Remove leading # and set to the amount of RAM for the most important data # cache in MySQL. Start at 70% of total RAM for dedicated server, else 10%. # innodb_buffer_pool_size = 128M # # Remove the leading "# " to disable binary logging # Binary logging captures changes between backups and is enabled by # default. It's default setting is log_bin=binlog # disable_log_bin # # Remove leading # to set options mainly useful for reporting servers. # The server defaults are faster for transactions and fast SELECTs. # Adjust sizes as needed, experiment to find the optimal values. # join_buffer_size = 128M # sort_buffer_size = 2M # read_rnd_buffer_size = 2M # # Remove leading # to revert to previous value for default_authentication_plugin, # this will increase compatibility with older clients. For background, see: # https://dev.mysql.com/doc/refman/8.0/en/server-system-variables.html#sysvar_default_authentication_plugin # default-authentication-plugin=mysql_native_password datadir=/var/lib/mysql socket=/var/lib/mysql/mysql.sock log-error=/var/log/mysqld.log pid-file=/var/run/mysqld/mysqld.pid lower_case_table_names=1 sql_mode='STRICT_TRANS_TABLES,NO_ZERO_IN_DATE,NO_ZERO_DATE,ERROR_FOR_DIVISION_BY_ZERO,NO_ENGINE_SUBSTITUTION'
启动:
1 2 3 4 5 6 7 8 9 10 11 12 13 14 15 groupadd mysql useradd -g mysql mysql mkdir -p /var/lib/mysql mysqld --initialize --user=mysql chown -R mysql:mysql /var/lib/mysql chmod -R 777 /var/lib/mysql centOS6: service mysqld start 查看启动状态 service mysqld status 设置开机启动(可不用,安装完,默认自启) chkconfig mysqld on
1 2 3 4 5 6 7 8 9 10 11 12 以下为备份内容,并未执行: 如果以root用户身份登录CentOS 6.8服务器,可以执行如下命令。 mysqld --initialize --user=mysql mysqld --initialize-insecure --user=mysql 如果以mysql用户身份登录CentOS 6.8服务器,可以执行如下命令。 mysqld --initialize mysqld --initialize-insecure 因为我这里使用的是root账户登录CentOS 6.8服务器,所以,初始化数据库时,我执行的是如下命令。 mkdir -p /usr/local/mysql chown -R mysql.mysql /usr/local/mysql mysqld --initialize --user=mysql --basedir=/usr/local/mysql --datadir=/usr/local/mysql/data 注意:这里,我在执行mysqld --initialize命令时,指定了MySQL的安装目录。 在MySQL的安装过程中,建议指定MySQL的安装目录。当/usr/local/mysql目录下存在data目录时,会初始化失败,必须确保/usr/local/mysql下没有data目录。
查看临时生成的密码:
1 cat /var/log/mysqld.log | grep password
修改初始密码:
1 2 3 4 5 mysql -u root -p >e.)g:qlr6eB # 高版本数据库使用强密码规则,密码设置尽可能麻烦,大写+小写+数字+符号 ALTER USER 'root'@'localhost' IDENTIFIED BY 'CNMpgz123!'; exit;
创建远程账号:
1 2 3 4 5 6 mysql -u root -p CNMpgz123! CREATE USER 'remote'@'%' IDENTIFIED BY 'CNMpgz123!'; GRANT ALL PRIVILEGES ON *.* TO 'remote'@'%'WITH GRANT OPTION; FLUSH PRIVILEGES; exit;
配置防火墙 vi /etc/sysconfig/iptables
1 2 3 4 5 6 7 8 9 10 11 12 13 14 15 16 17 18 19 20 21 22 # Firewall configuration written by system-config-firewall # Manual customization of this file is not recommended. *filter :INPUT ACCEPT [0:0] :FORWARD ACCEPT [0:0] :OUTPUT ACCEPT [0:0] -A INPUT -m state --state ESTABLISHED,RELATED -j ACCEPT -A INPUT -p icmp -j ACCEPT -A INPUT -i lo -j ACCEPT -A INPUT -m state --state NEW -m tcp -p tcp --dport 22 -j ACCEPT -A INPUT -m state --state NEW -m tcp -p tcp --dport 22000 -j ACCEPT -A INPUT -m state --state NEW -m tcp -p tcp --dport 3306 -j ACCEPT -A INPUT -m state --state NEW -m tcp -p tcp --dport 80 -j ACCEPT -A INPUT -m state --state NEW -m tcp -p tcp --dport 8080 -j ACCEPT -A INPUT -m state --state NEW -m tcp -p tcp --dport 3000 -j ACCEPT -A INPUT -m state --state NEW -m tcp -p tcp --dport 4000 -j ACCEPT -A INPUT -m state --state NEW -m tcp -p tcp --dport 9527 -j ACCEPT -A INPUT -m state --state NEW -m tcp -p tcp --dport 443 -j ACCEPT -A INPUT -j REJECT --reject-with icmp-host-prohibited -A FORWARD -j REJECT --reject-with icmp-host-prohibited COMMIT
修改完成后,重启防火墙:service iptables restart,如果有必要,请登录云安全组开放端口。
rpm方式安装mysql默认位置:
1 2 3 4 5 6 7 8 1、数据库目录 /var/lib/mysql/ 2、配置文件 /usr/share/mysql(mysql.server命令及配置文件) 3、相关命令 /usr/bin(mysqladmin mysqldump等命令) 4、启动脚本 /etc/rc.d/init.d/(启动脚本文件mysql的目录)
Git安装 卸载旧版本:
1 2 3 4 5 查看源版本信息: yum info git git --version 如果安装了,卸载: yum remove git
安装依赖:
1 yum install -y asciidoc docbook2X xmlto texinfo sgml2xml autoconf openjade curl-devel expat-devel gettext-devel openssl-devel zlib-devel gcc perl-ExtUtils-MakeMaker
上传git安装包,并解压:
1 2 3 4 5 6 7 8 cd /server/backup/gs/ tar -zxvf git-2.26.2.tar.gz cd git-2.26.2 make configure ./configure --prefix=/usr/local/git make && make install sudo echo "export PATH=$PATH:/usr/local/git/bin" >> /etc/profile source /etc/profile
验证Git是否安装成功:
Gogs安装 创建git用户:
上传文件并解压。
1 2 3 4 5 6 cd /server/backup/gs/ mv /server/backup/gs/gogs_0.11.91_linux_amd64.tar /home/git/ cd /home/git/ su git tar -xvf gogs_0.11.91_linux_amd64.tar cd /home/git/gogs/
创建gogs,mysql用户密码,专门用于gogs本地访问:
1 2 3 4 5 6 7 8 9 mysql -u root -p CNMpgz123! CREATE USER 'gogs'@'localhost' IDENTIFIED BY 'CNMpgz123!'; GRANT ALL PRIVILEGES ON *.* TO 'gogs'@'localhost'WITH GRANT OPTION; FLUSH PRIVILEGES; # 高版本建库或者导入gogs.mysql.sql都会报错,建议手动建 #SET GLOBAL innodb_file_per_table = ON,innodb_file_format = Barracuda,innodb_large_prefix = ON; # DROP DATABASE IF EXISTS gogs; # CREATE DATABASE IF NOT EXISTS gogs CHARACTER SET utf8mb4 COLLATE utf8mb4_general_ci;
手动创建数据库(导入gogs自带sql文件报错,0.13版本修复):
1 新建数据库,这里建议直接新建数据库,设置好编码格式utf8mb4,上面我们不是用navicate测试远程链接了吗,最好使用客户端进行直接新建数据库gogs,
安装:
1 2 3 4 cd /home/git/gogs/ ./gogs web 211.149.239.182:3000 59.110.21.159:3000
安装完成:根据页面填写参数:(0.13部分参数废弃)
1 2 3 4 5 6 7 8 9 10 11 12 13 14 15 16 17 18 19 20 21 22 23 24 25 26 27 28 29 30 31 32 33 34 35 36 37 38 39 40 41 42 43 44 45 46 47 48 49 50 51 52 53 54 55 56 APP_NAME = Gogs RUN_USER = git RUN_MODE = prod [database] DB_TYPE = mysql HOST = 127.0.0.1:3306 NAME = gogs USER = gogs PASSWD = CNMpgz123! SSL_MODE = disable PATH = data/gogs.db [repository] ROOT = /home/git/gogs-repositories [server] DOMAIN = localhost HTTP_PORT = 3000 ROOT_URL = http://localhost:3000/ DISABLE_SSH = false SSH_PORT = 22 START_SSH_SERVER = false OFFLINE_MODE = false [mailer] ENABLED = true HOST = smtp.163.com:465 FROM = 123@163.com USER = fasong@163.com PASSWD = fasongmima [service] REGISTER_EMAIL_CONFIRM = true ENABLE_NOTIFY_MAIL = true DISABLE_REGISTRATION = false ENABLE_CAPTCHA = true REQUIRE_SIGNIN_VIEW = true [picture] DISABLE_GRAVATAR = false ENABLE_FEDERATED_AVATAR = false [session] PROVIDER = file [log] MODE = file LEVEL = Info ROOT_PATH = /home/git/gogs/log [security] INSTALL_LOCK = true SECRET_KEY = Y81DPGiSppsWRED
加入开机启动:
1 2 3 4 5 6 7 ln -s /usr/local/git/bin/git /bin/git ln -s /usr/local/git/bin/git-upload-pack /bin/git-upload-pack ln -s /usr/local/git/bin/git-cvsserver /bin/git-cvsserver ln -s /usr/local/git/bin/gitk /bin/gitk ln -s /usr/local/git/bin/git-receive-pack /bin/git-receive-pack ln -s /usr/local/git/bin/git-shell /bin/git-shell ln -s /usr/local/git/bin/git-upload-archive /bin/git-upload-archive
1 2 3 4 5 6 7 8 9 10 centOS6: su root cp /home/git/gogs/scripts/init/centos/gogs /etc/rc.d/init.d/ chmod a+x /etc/rc.d/init.d/gogs chkconfig gogs on service gogs start #启动服务 service gogs stop #停止服务 service gogs restart #重启服务 ## 另一种临时启动可以进入安装目录~/gogs,执行: ./gogs web 不过这是关闭窗口就随之关闭
Nginx安装 下载上传文件。
安装依赖:
1 yum -y install gcc zlib zlib-devel pcre-devel openssl openssl-devel
1 2 3 # 如果已经安装,卸载原来的Nginx find -name nginx yum remove nginx
解压安装:
1 2 3 4 5 6 7 8 # 解压 cd /server/backup/gs/ tar -vxf nginx-1.18.0.tar.gz cd nginx-1.18.0 # 指定位置安装并且开启ssl ./configure --prefix=/usr/local/nginx --with-http_stub_status_module --with-http_ssl_module make && make install whereis nginx
配置环境变量:
1 2 3 4 5 6 7 8 9 10 11 12 13 vim /etc/profile ##### nginx ##### export NGINX_HOME=/usr/local/nginx export PATH=$NGINX_HOME/sbin:$PATH # 使配置立即生效 source /etc/profile # 测试是否生效 echo $PATH /usr/local/nginx/sbin:/usr/local/sbin:/usr/local/bin:/sbin:/bin:/usr/sbin:/usr/bin:/root/bin nginx -s reload nginx -v nginx -t
开机启动:
1 2 3 4 5 6 7 # 加入开机自启 vi /etc/rc.local /usr/local/nginx/sbin/nginx chmod 755 /etc/rc.local # 测试配置文件 /usr/local/nginx/sbin/nginx -t
Nginx配置SSL 获取证书,上传服务器。
配置Nginx.cnf:/usr/local/nginx/conf
1 2 3 4 server_name west.shidongvr.com; ssl_certificate /usr/local/nginx/cert/_.shidongvr.com_chain.crt; ssl_certificate_key /usr/local/nginx/cert/_.shidongvr.com_key.key;
1
2
INSTALL_LOCK = true SECRET_KEY = Y81DPGiSppsWRED
Nginx配置文件 1 2 3 4 5 6 7 8 9 10 11 12 13 14 15 16 17 18 19 20 21 22 23 24 25 26 27 28 29 30 31 32 33 34 35 36 37 38 39 40 41 42 43 44 45 46 47 48 49 50 51 52 53 54 55 56 57 58 59 60 61 62 63 64 65 66 67 68 69 70 71 72 73 74 75 76 77 78 79 80 81 82 83 84 85 86 87 88 89 90 91 92 93 94 95 96 97 98 99 100 101 102 103 104 105 106 107 108 109 110 111 112 113 114 115 116 117 118 119 120 121 122 123 124 125 126 127 128 129 130 131 132 133 134 135 136 137 138 139 140 141 142 143 144 145 146 147 148 149 150 151 152 153 154 155 156 157 158 159 160 161 162 163 164 165 166 167 168 169 170 171 172 173 174 175 176 177 178 179 180 181 182 183 184 185 186 187 188 189 190 191 192 193 194 195 196 197 198 199 200 #user nobody; worker_processes 1; #error_log logs/error.log; #error_log logs/error.log notice; #error_log logs/error.log info; #pid logs/nginx.pid; events { worker_connections 1024; } http { include mime.types; default_type application/octet-stream; #log_format main '$remote_addr - $remote_user [$time_local] "$request" ' # '$status $body_bytes_sent "$http_referer" ' # '"$http_user_agent" "$http_x_forwarded_for"'; #access_log logs/access.log main; sendfile on; #tcp_nopush on; #keepalive_timeout 0; keepalive_timeout 65; #gzip on; client_max_body_size 1024M; client_body_buffer_size 10M; server { listen 443 ssl; server_name west.shidongvr.com; ssl_certificate /usr/local/nginx/cert/_.shidongvr.com_chain.crt; ssl_certificate_key /usr/local/nginx/cert/_.shidongvr.com_key.key; ssl_session_cache shared:SSL:1m; ssl_session_timeout 5m; ssl_ciphers HIGH:!aNULL:!MD5; ssl_prefer_server_ciphers on; location / { proxy_set_header Host $host:3000; proxy_set_header X-Real-IP $remote_addr; proxy_pass https://127.0.0.1:3000; } location /zhds { alias /home/zhds/1; index index.html; } } server { listen 80; server_name west.shidongvr.com; #charset koi8-r; #access_log logs/host.access.log main; # location / { # proxy_pass http://127.0.0.1:3000; # } # 强制跳转https rewrite ^(.*) https://$server_name$1 permanent; error_page 404 /404.html; # redirect server error pages to the static page /50x.html # error_page 500 502 503 504 /50x.html; location = /50x.html { root html; } # proxy the PHP scripts to Apache listening on 127.0.0.1:80 # #location ~ \.php$ { # proxy_pass http://127.0.0.1; #} # pass the PHP scripts to FastCGI server listening on 127.0.0.1:9000 # #location ~ \.php$ { # root html; # fastcgi_pass 127.0.0.1:9000; # fastcgi_index index.php; # fastcgi_param SCRIPT_FILENAME /scripts$fastcgi_script_name; # include fastcgi_params; #} # deny access to .htaccess files, if Apache's document root # concurs with nginx's one # #location ~ /\.ht { # deny all; #} } server { listen 80; server_name nb.nogit.top; #charset koi8-r; #access_log logs/host.access.log main; location / { # proxy_pass http://127.0.0.1:3000; root /home/myblog/public; index index.html; } # 强制跳转https rewrite ^(.*) https://$server_name$1 permanent; error_page 404 /404.html; # redirect server error pages to the static page /50x.html # error_page 500 502 503 504 /50x.html; location = /50x.html { root html; } # proxy the PHP scripts to Apache listening on 127.0.0.1:80 # #location ~ \.php$ { # proxy_pass http://127.0.0.1; #} # pass the PHP scripts to FastCGI server listening on 127.0.0.1:9000 # #location ~ \.php$ { # root html; # fastcgi_pass 127.0.0.1:9000; # fastcgi_index index.php; # fastcgi_param SCRIPT_FILENAME /scripts$fastcgi_script_name; # include fastcgi_params; #} # deny access to .htaccess files, if Apache's document root # concurs with nginx's one # #location ~ /\.ht { # deny all; #} } # another virtual host using mix of IP-, name-, and port-based configuration # #server { # listen 8000; # listen somename:8080; # server_name somename alias another.alias; # location / { # root html; # index index.html index.htm; # } #} # HTTPS server # #server { # listen 443 ssl; # server_name localhost; # ssl_certificate cert.pem; # ssl_certificate_key cert.key; # ssl_session_cache shared:SSL:1m; # ssl_session_timeout 5m; # ssl_ciphers HIGH:!aNULL:!MD5; # ssl_prefer_server_ciphers on; # location / { # root html; # index index.html index.htm; # } #} }
Gogs配置文件 1 2 3 4 5 6 7 8 9 10 11 12 13 14 15 16 17 18 19 20 21 22 23 24 25 26 27 28 29 30 31 32 33 34 35 36 37 38 39 40 41 42 43 44 45 46 47 48 49 50 51 52 53 54 55 56 57 58 59 60 61 62 63 64 65 66 67 68 69 70 71 72 73 74 75 76 77 78 79 80 81 82 83 84 85 86 87 88 89 90 91 92 93 # 应用名称,可以改为你组织或者公司名称 APP_NAME = Git # 运行用户 RUN_USER = git RUN_MODE = prod [database] DB_TYPE = mysql HOST = 127.0.0.1:3306 NAME = gogs USER = gogs PASSWD = CNMpgz123! SSL_MODE = disable PATH = data/gogs.db [admin] # 禁用普通用户创建组织 DISABLE_REGULAR_ORG_CREATION = true [repository] ROOT = /home/git/gogs-repositories # 全局默认的每个用户可创建创建仓库上限,-1 表示无限制 MAX_CREATION_LIMIT = 1 ENABLE_LOCAL_PATH_MIGRATION = true # 强制所有仓库私有 FORCE_PRIVATE = false # 禁用http,只能通过ssh协议操作 DISABLE_HTTP_GIT = false [server] PROTOCOL=https DOMAIN = west.shidongvr.com HTTP_PORT = 3000 # 公开完整路径 ROOT_URL = https://west.shidongvr.com/ DISABLE_SSH = false SSH_PORT = 22 START_SSH_SERVER = false # 激活该选项来禁止从 CDN 获取静态资源,同时 Gravatar 服务也将被自动禁用 OFFLINE_MODE = false ENABLE_GZIP = true LANDING_PAGE=false CERT_FILE=/usr/local/nginx/cert/_.shidongvr.com_chain.crt KEY_FILE=/usr/local/nginx/cert/_.shidongvr.com_key.key [mailer] ENABLED = false [service] # 注册必须邮箱验证 REGISTER_EMAIL_CONFIRM = false # 发送邮件通知 ENABLE_NOTIFY_MAIL = false # 禁止用户注册,只能管理员创建 DISABLE_REGISTRATION = true # 注册时输入验证码 ENABLE_CAPTCHA = false # 必须登录才能浏览 REQUIRE_SIGNIN_VIEW = true [picture] # 使用本地头像 DISABLE_GRAVATAR = false ENABLE_FEDERATED_AVATAR = false [session] PROVIDER = file [log] MODE = file LEVEL = Info ROOT_PATH = /home/git/gogs/log [security] INSTALL_LOCK = true SECRET_KEY = Y81DPGiSppsWRED # 记录登录天数 LOGIN_REMEMBER_DAYS = true COOKIE_USERNAME = true COOKIE_REMEMBER_NAME = true REVERSE_PROXY_AUTHENTICATION_USER = true [webhook] TYPES = gogs DELIVER_TIMEOUT = 300 SKIP_TLS_VERIFY = true PAGING_NUM = true [cron] ENABLED = true [other] SHOW_FOOTER_BRANDING = false SHOW_FOOTER_VERSION = false
swap创建 1 2 3 4 5 6 7 8 9 10 11 12 13 14 15 16 sudo dd if=/dev/zero of=/swapfile count=2048 bs=1M sudo chmod 600 /swapfile sudo mkswap /swapfile sudo swapon /swapfile echo '/swapfile none swap sw 0 0' | sudo tee -a /etc/fstab free -m history | grep 'swap' 删除 1. 停止正在使用的swap分区 $ swapoff /root/swap 2. 删除swap分区文件 $ rm /root/swap 3. 删除或注释在/etc/fstab文件中的以下开机自动挂载内容: $ vim /etc/fstab 在该文件中删除如下内容
额外 卸载jdk(如果需要) 1 2 3 rpm -e --nodeps java_cup-0.10k-5.el6.x86_64 rpm -e --nodeps java-1.5.0-gcj-1.5.0.0-29.1.el6.x86_64 rpm -e --nodeps gcc-java-4.4.7-23.el6.x86_64
配置gogs首页模板 tips:简单配置,0.13后会移除首页footer部分。目前测试自定义模板暂时不管用,可采用直接更改源码,尽量微改动。
/home/git/gogs/templates/base
 微信
微信 支付宝
支付宝